Best Korean Peel-and-Stick Wallpaper Brands
- Peel-and-stick insulation wallpaper often uses 5mm high-density foam for good insulation, with a natural embossed film surface Naver Blog: Peel-and-Stick Insulation Wallpaper Review.
Last updated: April 2026
Affiliate Disclosure: We may earn a commission when you purchase through our links. This does not affect our editorial independence.
Quick Answer
- Peel-and-stick insulation wallpaper often uses 5mm high-density foam for good insulation, with a natural embossed film surface Naver Blog: Peel-and-Stick Insulation Wallpaper Review.
- These wallpapers are typically made with polyethylene foam, plastic film, and aluminum foil, offering moisture resistance and preventing mold Tistory Blog: Insulation Wallpaper Installation and Effectiveness Test.
- Self-painting a room's wallpaper can be done in as little as 30 minutes if focused, according to one reviewer from November 2018 Naver Blog: Wallpaper Self-Painting Tips.
- One type of insulation wallpaper, a 20m roll, was priced around ₩10,000 more for versions with aluminum film on both sides (2024) Tistory Blog: Insulation Wallpaper Installation and Effectiveness Test.
Korean peel-and-stick wallpaper brands offer a practical and efficient solution for DIY home makeovers, providing significant advantages over traditional painting methods. These innovative wallpapers simplify the renovation process, making it accessible even for beginners. For instance, a DIYer managed to paint a small room's wallpaper in just 1 hour and 30 minutes, noting that the actual painting could have been completed in 30 minutes with focused effort, as shared in November 2018 Naver Blog: Wallpaper Self-Painting Tips. Beyond aesthetics, many Korean peel-and-stick options, particularly insulation wallpapers, provide functional benefits like enhanced thermal efficiency and mold prevention. These products often feature a construction of foamed polyethylene, plastic film, and aluminum foil, contributing to their durability and protective qualities. The convenience of a strong adhesive backing eliminates the need for messy glues, allowing for quick application and minimal disruption to your home life. This makes them an ideal choice for refreshing spaces, addressing drafts, or simply updating your interior design with ease.
What are the advantages of peel-and-stick wallpaper compared to paint?
Peel-and-stick wallpaper offers a faster and less messy alternative to traditional painting, making it a popular choice for self-interior projects. While both paint and wallpaper can transform a space, peel-and-stick options often provide unique benefits that cater to efficiency and specific functional needs. Unlike painting, which requires careful preparation, multiple coats, and drying time, peel-and-stick wallpaper can be applied directly to a clean, flat surface, significantly reducing project duration. For example, while painting a room might involve waiting an hour for primer to dry before applying paint, peel-and-stick wallpaper allows for immediate results Naver Blog: Self-Interior Paint Guide. This speed is a major draw for individuals looking for quick home updates without extensive downtime.
Reduced Mess and Simplified Cleanup
One of the most significant advantages of peel-and-stick wallpaper is the minimal mess involved. Painting requires protecting floors, furniture, and adjacent surfaces with covering tape and masking tape to prevent splatters and drips. Paint trays need to be cleaned, and brushes and rollers require thorough washing. With peel-and-stick wallpaper, the process is cleaner; there are no liquids to spill, and waste primarily consists of backing paper and trimmed edges. This simplifies cleanup dramatically, allowing DIYers to complete projects without the extensive post-application tidying associated with painting. The absence of paint fumes is another benefit, making it suitable for households sensitive to odors or with young children.
Functional Benefits: Insulation and Mold Prevention
Beyond aesthetics, certain types of peel-and-stick wallpaper, especially insulation wallpapers, offer practical functional benefits that paint cannot provide. These specialized wallpapers are designed to improve a room's thermal efficiency, which is particularly useful in older homes or areas prone to drafts, such as single-story houses or top-floor apartments. For instance, one homeowner living in a 1st-floor detached house with a mountain view specifically sought out insulation wallpaper to combat drafts from windows and walls during winter Naver Blog: Peel-and-Stick Insulation Wallpaper Review. These products are often constructed with materials like 5mm high-density foam and an aluminum heat-reflective layer, which helps to retain warmth indoors.
Moreover, unlike traditional paper-based wallpapers or painted surfaces that can be susceptible to mold in high-humidity environments, many insulation wallpapers are made from chemical materials like foamed polyethylene. This composition prevents mold growth and makes the surface easy to clean with a wet cloth if it gets dirty Tistory Blog: Insulation Wallpaper Installation and Effectiveness Test. This feature is particularly advantageous for walls that experience condensation due to temperature differences, often seen in older buildings. The ability to resist mold and be easily maintained adds to the long-term appeal and hygiene of peel-and-stick insulation wallpaper.
Versatility and Durability
Peel-and-stick wallpaper offers a wide range of designs, textures, and finishes that can mimic various materials, from natural wood to intricate patterns, often with an embossed feel that adds depth and realism. While paint offers precise color matching, wallpaper provides a broader spectrum of visual and tactile textures. The durability of peel-and-stick options, especially those with strong adhesives and protective outer layers, can also be a deciding factor. They can withstand wear and tear better than some painted surfaces, and minor damages are often less noticeable or can be patched more easily than paint chips or scratches. The strong adhesive backing ensures that the wallpaper stays firmly in place, preventing peeling or bubbling, which is crucial for a lasting finish.
In our analysis, when comparing the ease of application, functional benefits, and aesthetic versatility, peel-and-stick wallpaper often emerges as a compelling alternative to paint, especially for DIY enthusiasts seeking efficiency and added value in their home renovation projects.
How does insulation wallpaper work?
Insulation wallpaper functions by incorporating multiple layers of materials designed to reduce heat transfer and enhance a room's thermal efficiency. At its core, insulation wallpaper typically consists of a chemical material like foamed polyethylene, which provides the primary insulating bulk. This foam layer is then covered with various films, most notably a plastic film on the outer surface and an aluminum foil layer on the inner, adhesive side. This multi-layered structure works synergistically to minimize heat loss in cold environments and heat gain in warm ones.
The Role of Foamed Polyethylene
The foamed polyethylene component in insulation wallpaper acts as a barrier against conductive heat transfer. Similar to a sponge, this material contains numerous tiny air pockets within its structure. Air is a poor conductor of heat, meaning it doesn't allow heat to pass through it easily. By trapping air, the foamed polyethylene significantly slows down the rate at which heat moves from a warmer area to a cooler one. This is crucial for maintaining a stable indoor temperature, reducing the need for constant heating or cooling. The density and thickness of this foam layer directly impact its insulating capabilities; for example, products featuring a 5mm high-density foam are specifically noted for their good insulation effect Naver Blog: Peel-and-Stick Insulation Wallpaper Review.
The Heat-Reflective Aluminum Foil Layer
A critical component of modern insulation wallpaper is the aluminum foil layer, often referred to as a thermal reflective insulator. This layer is typically positioned on the side that faces the wall, behind the foam. Its primary function is to reflect radiant heat. When heat energy travels through a room, a significant portion of it moves as radiant heat, similar to how sunlight warms objects. The aluminum foil's shiny surface is highly effective at bouncing this radiant heat back into the room. This means that in winter, heat generated by your heating system is reflected back into the living space instead of escaping through the walls. Conversely, in summer, external radiant heat from the sun is reflected away from the interior, helping to keep the room cooler.
The effectiveness of this reflective layer can be enhanced in some premium insulation wallpapers. For instance, a 20m roll of insulation wallpaper with aluminum film on both sides was priced approximately ₩10,000 more than single-sided versions in 2024 Tistory Blog: Insulation Wallpaper Installation and Effectiveness Test. This dual-sided reflective capability would provide even greater thermal performance by maximizing the reflection of radiant energy in both directions, further contributing to energy efficiency.
Preventing Condensation and Mold
Beyond thermal insulation, the materials used in these wallpapers also contribute to preventing condensation and mold growth. Traditional paper-based wallpapers can absorb moisture, creating an ideal environment for mold to thrive, especially in areas with significant temperature differences between the inside and outside of the wall (known as "condensation phenomenon"). However, because insulation wallpaper is made from chemical materials like foamed polyethylene and plastic films, it contains no paper components. This non-absorbent nature means that moisture cannot penetrate and accumulate within the wallpaper itself. When combined with the thermal barrier, which helps reduce the surface temperature difference on the wall, the risk of condensation forming on the interior wall surface is greatly minimized. This, in turn, prevents the conditions necessary for mold to grow, making insulation wallpaper a hygienic choice for damp-prone areas. If the surface does get dirty, it can simply be wiped clean with a wet cloth, further highlighting its low-maintenance and mold-resistant properties Tistory Blog: Insulation Wallpaper Installation and Effectiveness Test.
In summary, insulation wallpaper works through a combination of trapped air within foam for conductive insulation, aluminum foil for radiant heat reflection, and moisture-resistant materials to prevent mold, collectively creating a more thermally comfortable and healthier indoor environment.
What are the key features of quality Korean peel-and-stick insulation wallpaper?
Quality Korean peel-and-stick insulation wallpaper distinguishes itself through a combination of effective thermal properties, aesthetic appeal, and user-friendly design. These features are meticulously engineered to provide both functional benefits and a refined finish, making DIY home renovations both practical and satisfying. When selecting such products, understanding these key characteristics can help ensure you choose an option that truly enhances your living space.
Superior Insulation with High-Density Foam
A primary indicator of high-quality Korean peel-and-stick insulation wallpaper is the presence of a substantial, high-density foam layer. Typically, products featuring a 5mm high-density foam are highly regarded for their effective insulation capabilities Naver Blog: Peel-and-Stick Insulation Wallpaper Review. This foam acts as a robust thermal barrier, significantly reducing heat transfer through walls. The "high-density" aspect means the foam is packed more tightly, containing more air pockets per volume, which further enhances its ability to trap heat indoors during colder months and keep it out during warmer periods. This is particularly beneficial for homes in regions with fluctuating temperatures or for rooms that experience drafts, such as those in older buildings or on exposed outer walls. The thickness and density contribute directly to energy savings by maintaining a more stable indoor temperature, thereby lessening the reliance on heating or air conditioning systems.
Aesthetic Excellence: Embossed Film and Natural Textures
Beyond its functional insulation, quality Korean peel-and-stick wallpaper excels in its aesthetic presentation. Look for options that incorporate an embossed printed film on the surface. This technique creates a natural, refined look that can closely mimic the texture and appearance of traditional silk wallpaper. The embossing adds a tactile dimension and visual depth, preventing the wallpaper from looking flat or artificial. For instance, a reviewer noted that a peel-and-stick insulation wallpaper with an embossed printed film created a natural, neutral feel and blended seamlessly with existing silk wallpaper, suggesting a high level of quality in its finish Naver Blog: Peel-and-Stick Insulation Wallpaper Review. This attention to detail ensures that the wallpaper not only performs well but also contributes significantly to the overall interior design, offering a sophisticated and inviting atmosphere. The variety of designs available, from minimalist to intricate patterns, allows homeowners to achieve their desired aesthetic without compromising on functional benefits.
Strong Adhesive Backing for Easy DIY Application
The convenience of peel-and-stick wallpaper hinges on its adhesive quality. High-quality Korean products feature a strong, reliable adhesive backing that simplifies the DIY application process. This eliminates the need for messy, time-consuming glue application, which is a common hassle with traditional wallpapers. The backing is typically protected by a transparent vinyl film that is peeled away just before application. A strong adhesive ensures that the wallpaper adheres firmly to the wall and stays in place without peeling or bubbling over time. One reviewer highlighted the powerful adhesion of a product, stating that once applied, it would "definitely not fall off," which is crucial for a lasting and professional-looking finish Naver Blog: Peel-and-Stick Insulation Wallpaper Review. This robust adhesion is particularly important for busy households or those with children, as it provides peace of mind that the wallpaper will withstand daily wear and tear. The ease of application, combined with the strong bond, empowers individuals to undertake renovation projects with confidence, achieving professional results without specialized skills or equipment.
In essence, quality Korean peel-and-stick insulation wallpaper combines advanced material science for superior thermal performance with sophisticated aesthetic design and practical, user-friendly application, making it an excellent choice for modern home interiors.
Can you paint over existing wallpaper, and what are the risks?
Yes, it is possible to paint over existing wallpaper, but the success of the project heavily depends on the condition of the underlying wallpaper and careful preparation. Many DIY enthusiasts consider painting over wallpaper as a quicker alternative to stripping it, which can be a tedious and messy process. However, this approach comes with specific risks that need to be understood and mitigated to achieve a satisfactory and lasting finish. The surface of the existing wallpaper must be flat, smooth, and free from damage to provide a suitable base for paint.
Preparing the Wallpaper Surface for Painting
Before applying any paint, the existing wallpaper needs thorough inspection and preparation. The most crucial step is to ensure the surface is clean, dry, and structurally sound. Any dirt, grease, or dust should be meticulously wiped away. If the wallpaper has any loose seams, tears, or bubbles, these issues must be addressed first. Loose seams should be re-adhered, and small tears can be carefully mended. For any uneven areas, nail holes, or cracks, a putty application followed by smoothing with a spatula and light sanding after drying is necessary to create a perfectly flat surface Naver Blog: Self-Interior Paint Guide. This step is vital because paint will highlight any imperfections on the surface, making them more noticeable than they were under the original wallpaper. If the existing wallpaper is heavily textured or embossed, painting over it will retain that texture, which might not be the desired look.
Risks: Wrinkling, Cracking, and Uneven Adhesion
Painting over existing wallpaper carries several inherent risks that can compromise the final appearance and durability of your project. One significant risk is the wallpaper wrinkling or bubbling due due to moisture absorption from the paint. Water-based paints, especially, can cause the paper to swell and wrinkle, leading to an uneven and unsightly finish. The weight of the wet paint can also cause the wallpaper to sag or detach from the wall, resulting in cracks as the paint dries Naver Blog: Self-Interior Paint Guide. This is particularly true for older or poorly adhered wallpapers.
Another concern is adhesion. Paint might not bond effectively to certain wallpaper surfaces, especially those with a slick, vinyl, or heavily textured finish. This can lead to the paint peeling or flaking off over time. The original color or pattern of the wallpaper can also "bleed through" lighter paint colors, requiring multiple coats or specialized primers to achieve full opacity. If the wallpaper has a strong pattern or dark color, it might take 2-3 coats of primer, known as 'Jesso' in Korea, to completely cover the original color and ensure the new paint color appears vivid and true Naver Blog: Self-Interior Paint Guide.
The Importance of Primer (Jesso)
To mitigate these risks and improve the chances of a successful outcome, applying a primer, often called 'Jesso' in Korean DIY contexts, is highly recommended. Jesso is a thick, sticky paint-like substance that serves multiple purposes. It smooths the wall surface, acts as a barrier to prevent the existing wallpaper's color from showing through, and most importantly, enhances the adhesion of the new paint. By creating a uniform, receptive surface, Jesso improves both the attachment and vividness of the topcoat. For dark or patterned wallpapers, applying 2-3 coats of Jesso, allowing about an hour for drying after each coat, is advised before proceeding with the final paint application Naver Blog: Self-Interior Paint Guide. This crucial step helps to create a stable and even base, reducing the likelihood of the wallpaper reacting negatively to the paint and ensuring a smoother, more durable finish.
While painting over existing wallpaper can save time and effort compared to removal, it requires careful assessment of the wallpaper's condition and meticulous preparation, including the essential step of priming, to minimize risks and achieve a professional-looking result.
What tools do you need for a successful DIY wallpaper or paint project?
A successful DIY wallpaper or paint project hinges on having the right tools. While the core materials, paint or wallpaper, are obvious, a range of supporting equipment is essential for achieving a clean, professional-looking finish. These tools help with preparation, application, and protection, streamlining the entire process for both painting and wallpaper installation.
Essential Tools for Painting Projects
For painting, a basic setup involves more than just paint and a brush. To ensure a neat and efficient application, you will need several key items:
- Paint and Brushes: While a given, brushes are crucial for detailed work, especially in corners, edges, and contoured areas. A 1 to 1.5-inch brush is often recommended for these tasks Naver Blog: Self-Interior Paint Guide.
- Rollers and Trays: Rollers are ideal for covering large, flat wall surfaces quickly and evenly. A paint tray is essential for holding paint and regulating the amount on the roller, preventing drips and uneven application.
- Masking Tape and Covering Tape: These are indispensable for protecting areas you don't want to paint. Masking tape is used for precise edges around door frames, windows, and electrical outlets, ensuring sharp, clean lines. Covering tape, which often comes with a plastic sheet attached, is used to cover larger areas like floors or furniture, protecting them from accidental paint splatters Naver Blog: Self-Interior Paint Guide.
- Primer (Jesso): As discussed, a primer is crucial for improving paint adhesion, especially when painting over existing wallpaper or dark colors. It also helps create a smooth, uniform surface for the topcoat.
- Putty and Spatula: For walls with imperfections like nail holes or cracks, putty is used to fill these gaps, and a spatula helps to smooth the surface. After drying, light sanding creates a perfectly flat base for painting.
Specialized Tools for Wallpaper Painting
When specifically painting over existing wallpaper, some tools can significantly improve the process and outcome.
- Paint Pad: This tool is highly recommended for painting wallpaper. A paint pad covers large areas incredibly fast and efficiently compared to traditional rollers or brushes. One DIY reviewer enthusiastically stated, "The paint pad is truly optimized for wallpaper painting. It covers an incredibly fast and large area at once compared to rollers or brushes. I always use this for wallpaper painting after discovering it" (translated from Korean) [Naver Blog: Wallpaper Self-Painting Tips](https://m.blog.naver.com/isyoon71/221398747220]. Its design allows for smooth, even application with less dripping, making it ideal for achieving a clean finish on wallpapered surfaces.
- Spray Bottle: A simple spray bottle filled with water can be a game-changer when painting over wallpaper. Lightly misting the wallpaper surface before applying paint helps the paint spread more smoothly and prevents it from flowing or dripping. This technique ensures a more even coat and a cleaner finish [Naver Blog: Wallpaper Self-Painting Tips](https://m.blog.naver.com/isyoon71/221398747220].
Tools for Peel-and-Stick Wallpaper Installation
While peel-and-stick wallpaper largely eliminates the need for glues and many painting tools, some items are still beneficial for a smooth installation.
- Utility Knife/Craft Knife: Essential for cutting the wallpaper to size and trimming edges neatly.
- Smoother/Squeegee: A plastic smoother or squeegee helps to press the wallpaper firmly onto the wall, removing air bubbles and ensuring a smooth, even adhesion.
- Measuring Tape and Pencil: Accurate measurements are crucial for cutting wallpaper pieces to the correct dimensions and ensuring patterns align.
- Level: A level helps ensure that the first strip of wallpaper is applied perfectly straight, which is critical for the alignment of subsequent strips.
- Cleaning Supplies: Before applying peel-and-stick wallpaper, the wall must be thoroughly cleaned to ensure optimal adhesion. A clean cloth and mild cleaner are usually sufficient.
Having these tools at hand, whether for painting or peel-and-stick wallpaper, will significantly contribute to a more efficient, less frustrating, and ultimately more successful DIY home improvement project.
How long does a DIY wallpaper or paint project typically take?
The duration of a DIY wallpaper or paint project can vary significantly depending on the size of the room, the complexity of the task, and the specific materials used. However, with proper planning and focused effort, many self-interior projects can be completed relatively quickly, often within a few hours or a single day. The ease of peel-and-stick options and efficient painting techniques can drastically reduce the time commitment.
Expedited Painting Projects
For painting projects, particularly those involving existing wallpaper, the actual painting time can be surprisingly short if preparation is thorough. One DIYer shared their experience from November 2018, noting that they aimed to paint a small room's wallpaper in just 30 minutes. Although filming and other distractions extended their total project time to 1 hour and 30 minutes, they emphasized that the actual paint application could have been completed within the initial 30-minute goal if they had focused solely on painting [Naver Blog: Wallpaper Self-Painting Tips](https://m.blog.naver.com/isyoon71/221398747220]. This anecdote highlights that the physical act of applying paint can be quite swift, especially with tools like a paint pad that quickly cover large areas.
However, it's important to account for preparation and drying times. Before painting, cleaning the wall surface and performing any necessary repairs, such as filling holes with putty and sanding, can add time. If a primer (Jesso) is used, which is highly recommended for painting over wallpaper or dark colors, it typically requires about 1 hour to dry before the first coat of paint can be applied [Naver Blog: Self-Interior Paint Guide](https://m.blog.naver.com/igeon3427/222888763717]. If multiple coats of primer are needed (e.g., 2-3 coats for very dark wallpaper), this drying time will accumulate. Similarly, if multiple coats of paint are required to achieve the desired color depth and coverage, each coat will need adequate drying time, usually a few hours, before the next can be applied. Despite these intermediate steps, the hands-on painting portion itself can be quite fast.
Quick Peel-and-Stick Wallpaper Installation
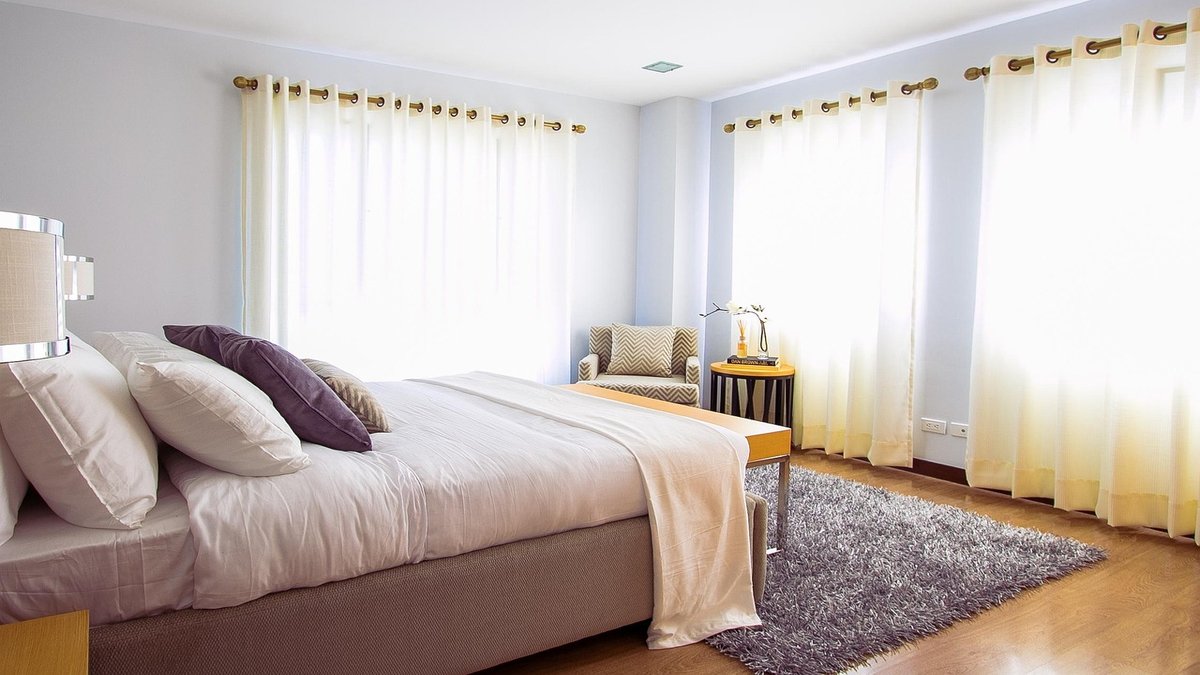
Peel-and-stick wallpaper projects are generally known for their speed and ease, often taking less time than painting because they eliminate drying times for primer and paint. The process primarily involves measuring, cutting, peeling the backing, and sticking the wallpaper to the wall. For instance, a homeowner installing peel-and-stick insulation wallpaper in a family bedroom noted that the process was quick and convenient, allowing them to complete the self-installation in just a short amount of time during a weekend. The absence of messy glue and drying periods meant they could finish the project without worrying about children touching wet surfaces [Naver Blog: Peel-and-Stick Insulation Wallpaper Review](https://m.blog.naver.com/king0655/221456349911].
The speed of peel-and-stick installation is also attributed to its straightforward application method. With no special skills required beyond careful measurement and attention to detail, individuals can achieve professional-looking results relatively quickly. For a typical room, a peel-and-stick wallpaper project can often be completed within a single afternoon, making it an ideal choice for those seeking a rapid transformation. Even for larger areas, dividing the project into smaller, manageable sections, such as focusing on one wall at a time, can make the process feel less daunting and quicker to complete.
In conclusion, while preparation and drying times factor into painting projects, the active application for both painting and peel-and-stick wallpaper can be quite efficient. A focused DIYer can paint a room's wallpaper in as little as 30 minutes, while peel-and-stick applications offer similar swiftness by eliminating the need for wet adhesives and extensive drying periods. This makes both options viable for quick home makeovers.
What are the best practices for DIY wallpaper installation?
Successful DIY wallpaper installation, whether it's traditional wallpaper or the increasingly popular peel-and-stick variety, relies on meticulous preparation and careful application techniques. While peel-and-stick options simplify the process by eliminating messy glues, adhering to best practices ensures a smooth, durable, and aesthetically pleasing finish. These practices focus on creating an optimal surface, precise application, and achieving clean edges.
Thorough Wall Preparation
The foundation of any successful wallpaper project is a well-prepared wall surface. Before applying any wallpaper, the wall must be impeccably clean, dry, and smooth. Any dust, dirt, grease, or grime can interfere with the adhesive's bond, leading to bubbling or peeling over time. For walls with imperfections such as nail holes, cracks, or uneven patches, it's crucial to fill these with putty and smooth them with a spatula, then lightly sand the area once dry to create a perfectly flat surface Naver Blog: Self-Interior Paint Guide. If the wall has existing wallpaper, ensure it is firmly attached and free of damage. For peel-and-stick applications, a clean, smooth, non-porous surface is ideal for optimal adhesion.
For those considering painting over existing wallpaper, cleaning the surface is equally vital. After cleaning, a unique tip for painting wallpaper is to lightly mist the surface with water using a spray bottle before applying paint. This technique helps the paint spread more smoothly and evenly, preventing it from flowing or dripping, which can result in a cleaner, more professional finish [Naver Blog: Wallpaper Self-Painting Tips](https://m.blog.naver.com/isyoon71/221398747220]. This step ensures the paint adheres well and reduces the likelihood of an uneven coat.
Precise Measurement and Cutting
Accuracy in measurement and cutting is paramount to avoid waste and achieve seamless results. Before cutting, measure the height of your wall and add a few extra inches (typically 2-4 inches) to the top and bottom for trimming. This buffer allows for slight adjustments and ensures a perfect fit, especially if your walls are not perfectly plumb. When working with patterned wallpaper, it's essential to account for pattern repeat and match the design carefully across strips. Lay out your wallpaper strips on a clean, flat surface and use a utility knife and a straightedge for precise cuts. Pre-cutting all necessary strips before you begin applying them can streamline the installation process.
Strategic Application and Smoothing
The method of application varies slightly between peel-and-stick and traditional wallpaper, but the goal remains the same: smooth, bubble-free adhesion. For peel-and-stick wallpaper, start by peeling back a small portion of the backing from the top of the first strip. Align the strip carefully with your starting point on the wall (often a corner or a marked vertical line), ensuring it's straight. Gradually peel away the backing as you smooth the wallpaper onto the wall from top to bottom, working from the center outwards to push out any air bubbles. A smoother or squeegee tool is invaluable for this step, as it helps press the wallpaper firmly and evenly, ensuring strong adhesion and a flat surface.
When applying subsequent strips, ensure they are perfectly aligned with the previous one, paying close attention to pattern matching if applicable. Overlap seams slightly or butt them tightly together, depending on the wallpaper type and manufacturer's instructions. If you encounter small bubbles, you can often smooth them out with your squeegee. For stubborn bubbles, a small pinprick can release trapped air, allowing you to flatten the area.
Achieving Clean Edges and Finishing Touches
Clean, sharp edges are crucial for a professional look. For areas bordering ceilings, baseboards, door frames, or windows, use a utility knife with a fresh blade and a straightedge to trim excess wallpaper precisely. For neat and crisp lines around architectural features, switches, and outlets, masking tape is an indispensable tool. Before applying wallpaper or paint, carefully apply masking tape along these borders. For larger areas you want to protect, such as adjacent walls or floors, use covering tape. This meticulous taping ensures that your wallpaper or paint adheres only where intended, resulting in a clean and defined finish [Naver Blog: Self-Interior Paint Guide](https://m.blog.naver.com/igeon3427/222888763717]. Once the wallpaper is installed, or the paint is dry, carefully remove the tape while the material is still slightly pliable to prevent tearing. This attention to detail in preparation and application ensures a high-quality, long-lasting DIY wallpaper project.
Frequently Asked Questions
Is peel-and-stick wallpaper easy to remove?
Peel-and-stick wallpaper is generally designed for easier removal compared to traditional wallpaper that requires steaming or soaking. The adhesive is formulated to allow for repositioning during installation and clean removal when it's time for a change. However, ease of removal can depend on the quality of the wallpaper, the condition of the wall surface, and how long it has been applied. Walls that were properly prepared (clean, smooth, primed) tend to allow for easier removal with less damage. One type of insulation wallpaper, a 20m roll, was priced around ₩10,000 more for versions with aluminum film on both sides (2024), suggesting that material quality can influence all aspects of its lifecycle, including removal.
Can peel-and-stick wallpaper be used in bathrooms or high-moisture areas?
Some peel-and-stick wallpapers are suitable for high-moisture areas like bathrooms, but it's crucial to choose products specifically designed for such environments. Look for wallpapers labeled as "waterproof," "moisture-resistant," or "mildew-proof." These typically feature vinyl or other non-porous surfaces that can withstand humidity and prevent mold growth. Insulation wallpapers, for instance, are made of chemical materials like foamed polyethylene and plastic films, containing no paper components, which makes them resistant to mold even in damp conditions Tistory Blog: Insulation Wallpaper Installation and Effectiveness Test. Always ensure the wall surface is extremely clean and dry before application to maximize adhesion in humid conditions.
How do I calculate how much peel-and-stick wallpaper I need?
To calculate how much peel-and-stick wallpaper you need, measure the height and width of each wall you plan to cover. Multiply the height by the width to get the square footage of each wall, then add them together for the total area. Divide this total by the square footage covered by one roll of your chosen wallpaper (this information is usually provided by the manufacturer). Always add an extra 10-15% to your total to account for pattern matching, trimming, and potential mistakes. For example, a 20m roll of insulation wallpaper is a common length, and understanding its coverage will help in your calculations Tistory Blog: Insulation Wallpaper Installation and Effectiveness Test.
What surfaces are suitable for peel-and-stick wallpaper?
Peel-and-stick wallpaper adheres best to smooth, clean, dry, and non-porous surfaces. Ideal surfaces include painted drywall (with an eggshell, satin, or semi-gloss finish), smooth plaster, and some types of finished wood or laminate. Rough, textured, or porous surfaces (like unpainted drywall, brick, or highly textured wallpaper) are generally not suitable as they can prevent proper adhesion and may show through the wallpaper. If painting over existing wallpaper, the surface must be flat and free of damage, as paint can cause the wallpaper to wrinkle or crack if it's not Naver Blog: Self-Interior Paint Guide.
Does peel-and-stick wallpaper damage walls upon removal?
When properly installed and removed from a well-prepared surface, quality peel-and-stick wallpaper should not damage walls. The adhesive is designed to be temporary and leave no residue. However, damage can occur if the underlying paint is not well-bonded to the wall, if the wall surface was not adequately primed, or if the wallpaper is removed too quickly or aggressively. Walls painted with flat or matte finishes are more susceptible to damage than those with satin or semi-gloss paints. One DIYer noted that focused painting of wallpaper could be done in 30 minutes (November 2018), implying the underlying surface was suitable for adhesion and likely for removal too.
Related Reading
- Best Korean Bathroom Tile Brands
- Best Korean Bathroom Vanity Brands
- Best Korean Bedding and Pillow Brands
- Best Korean Candle and Diffuser Brands
- Best Korean Curtain and Blind Brands
— The Self Interior Team