Korean Self-Interior (Sel-Injeolia): DIY Home Transformation Guide
- Painting is cheaper and easier than wallpapering for self-interior projects, allowing precise color expression and saving time with no separate molding finishes Naver Blog: Self-Interior Paint Types and Methods.
Last updated: April 2026
Affiliate Disclosure: We may earn a commission when you purchase through our links. This does not affect our editorial independence.
Quick Answer
- Painting is cheaper and easier than wallpapering for self-interior projects, allowing precise color expression and saving time with no separate molding finishes Naver Blog: Self-Interior Paint Types and Methods.
- Water-based paints are suitable for indoor use, dry quickly, and have low odor, but may require extra coating for durability.
- Adhesive thermal wallpaper, often 5mm thick, can improve insulation and prevent mold, making it ideal for older homes Naver Blog: Adhesive Thermal Wallpaper Review.
- One DIY enthusiast completed a wallpaper painting project in 1 hour and 30 minutes, aiming for 30 minutes (published 2018) Naver Blog: 7 Tips for Painting Wallpaper.
Korean self-interior, known as sel-injeolia, empowers homeowners to transform their living spaces with cost-effective and accessible DIY projects. Among the simplest yet most impactful transformations is painting, which offers a more budget-friendly and straightforward alternative to traditional wallpapering. Painting allows for exact color matching, ensuring your vision comes to life on your walls and furniture. Beyond aesthetics, paint serves a protective function, safeguarding materials like wood and metal while enhancing a room's overall beauty. For those tackling larger projects, even covering an entire room's wallpaper can be surprisingly quick; one DIYer reported finishing a small room in 1 hour and 30 minutes, originally aiming for just 30 minutes, back in 2018 Naver Blog: 7 Tips for Painting Wallpaper. This ease of application, combined with the availability of specialized products like adhesive thermal wallpaper for improved insulation, makes sel-injeolia a popular choice for refreshing homes.
What is Self-Interior Painting?
Self-interior painting is a popular approach to home renovation in Korea, offering a practical and visually impactful way to update living spaces without the need for professional contractors for every step. It’s recognized as one of the most accessible entry points into interior construction, alongside wallpapering. This method allows individuals to take direct control over their home's aesthetics, choosing colors and finishes that perfectly match their personal style. Unlike wallpaper, which can be more complex to install, painting is generally simpler, making it a preferred choice for many DIY enthusiasts.
One of the primary advantages of self-interior painting is its cost-effectiveness. The materials required for painting are often cheaper than those for wallpapering. This makes it an attractive option for budget-conscious homeowners looking to refresh their space without a significant financial outlay. Beyond the initial cost, the application process itself is often less demanding, allowing individuals with minimal prior experience to achieve professional-looking results.
Precise Color Expression and Efficiency
A key benefit of painting is the ability to achieve precise color expression. When you select a paint color, you can be confident that the final result on your wall or furniture will accurately reflect that choice. This level of control over color is often harder to achieve with wallpaper, where patterns and textures can sometimes limit exact color matching. The ability to mix and match specific shades also opens up a wider range of design possibilities, enabling highly personalized interiors.
Furthermore, self-interior painting offers significant time and efficiency advantages. It often eliminates the need for separate molding finishes, which can be a time-consuming and intricate part of traditional interior design. By painting walls and moldings in a cohesive manner, or simply painting over existing surfaces, DIYers can streamline the renovation process. This efficiency makes painting a practical choice for those with busy schedules who want to complete a home update quickly.
Protection and Aesthetic Value
Beyond its visual appeal, paint serves a crucial functional role. It acts as a protective layer for various materials, including wood, furniture, and even certain types of walls. This protective quality helps guard against wear and tear, moisture, and potential damage, extending the life of the underlying surfaces. For instance, specialized paints can offer properties like waterproofing and anti-bacterial protection, contributing to a healthier and more durable living environment.
In addition to protection, paint significantly enhances the aesthetic value of a space. Color has a profound impact on mood and perception, and through painting, homeowners can dramatically alter the atmosphere of a room. A fresh coat of paint can make a space feel larger, brighter, or more cozy, depending on the chosen hues. It transforms a simple wall into a canvas, allowing for artistic expression and the creation of visually appealing environments. Paint is truly an interior finishing material that combines both functional protection and aesthetic enhancement, making it an indispensable tool in any self-interior project.
However, it's important to note that successful self-painting depends on a flat surface. If you plan to paint over existing wallpaper, you must ensure the wallpaper is in good condition. If the wallpaper has scratches or imperfections, moisture from the paint could cause it to wrinkle, or the weight of the paint could lead to cracks. For wooden, furniture, or flat wall surfaces, painting is a straightforward process that most people can easily manage Naver Blog: Self-Interior Paint Types and Methods.
What Are the Different Types of Paint for DIY?
When embarking on a self-interior painting project, understanding the different types of paint available is crucial for selecting the right product for your specific needs. Paints are categorized based on their primary components, application areas, and functional properties. The three main types commonly encountered in DIY projects are water-based paints, oil-based paints, and eco-friendly paints. Each type offers distinct advantages and disadvantages in terms of cost, drying time, odor, and durability.
Water-Based Paints (수성페인트)
Water-based paints, also known as latex paints, are diluted with water, making them easy to work with for most DIYers. They are highly favored for indoor use due to their quick drying time and minimal odor. This characteristic makes them particularly suitable for living spaces, bedrooms, and other areas where strong fumes would be undesirable or disruptive. The ease of application and cleanup (requiring only water) further enhances their appeal for self-interior projects.
While generally more affordable than oil-based paints, water-based paints traditionally had weaker durability and water resistance. However, modern advancements have significantly improved their performance. Today, many water-based paints incorporate advanced ingredients like acrylic emulsion, enamel emulsion, and hydrophilic synthetic resins. These components help form a robust film as the water evaporates, greatly enhancing the paint's water resistance and overall durability. This means that contemporary water-based paints can offer a good balance of ease of use and long-lasting finish, though some applications might still benefit from an additional protective coating for maximum resilience.
Despite these improvements, water-based paints still have some limitations. Because their primary component is water, they are less toxic and pose a lower fire risk compared to oil-based options. However, in high-humidity environments, there's a higher chance of mold or rust developing. Stains can also be more difficult to remove once they set on a water-based painted surface. These considerations should guide your choice, especially for areas prone to moisture or heavy use.
Oil-Based Paints (유성페인트)
Oil-based paints are diluted with volatile solvents, often referred to as paint thinners. These paints are generally more expensive and have a longer drying time compared to water-based alternatives. A significant characteristic of oil-based paints is their strong odor, which can linger for an extended period after application. Furthermore, the thinners used for dilution are highly flammable, requiring careful handling and ensuring no exposure to open flames during use.
Despite these drawbacks, oil-based paints offer superior durability and versatility, making them suitable for a wider range of surfaces, including wood and metal. They are known for their excellent weather resistance, meaning they can withstand various climatic conditions such as sunlight, wind, and humidity without significant wear or fading. This makes them an ideal choice for outdoor applications or interior areas that experience high traffic and require a robust, long-lasting finish. Oil-based paints also provide a more vivid and rich color payoff, with a distinct clarity that can enhance the visual depth of a surface.
Within the category of oil-based paints, various specialized types exist, including urethane, epoxy, lacquer, and enamel. Each of these is formulated for specific uses and provides different levels of hardness, gloss, and resistance. For instance, urethane paints are often used for floors or areas needing high abrasion resistance, while enamel paints provide a hard, glossy finish suitable for trim and doors. The choice among these sub-types depends on the specific demands of your project.
Eco-Friendly Paints (친환경페인트)
Eco-friendly paints are formulated to contain minimal or no harmful substances. These paints are similar to water-based paints in their application properties, often sharing characteristics like low odor and quick drying. However, their defining feature is the absence of volatile organic compounds (VOCs) and other toxic chemicals that can be detrimental to health. This makes them an excellent choice for households with young children, pregnant individuals, or anyone with sensitive skin or respiratory issues.
The demand for eco-friendly paints has grown significantly as consumers become more aware of indoor air quality and its impact on health. These paints contribute to a healthier indoor environment by releasing fewer pollutants during and after application. They allow homeowners to renovate their spaces with peace of mind, knowing they are not introducing harmful chemicals into their homes. For example, Igeon Design, a company with 20 years of interior experience, offers eco-friendly paint options for direct selection and installation, emphasizing their commitment to health-conscious choices Naver Blog: Self-Interior Paint Types and Methods.
While eco-friendly paints may sometimes be slightly more expensive than conventional water-based options, the benefits to health and environmental sustainability often outweigh the additional cost for many consumers. They represent a conscious choice for creating beautiful and safe living spaces, aligning with a broader trend towards sustainable and health-conscious home design.
How Do You Prepare for a Self-Painting Project?
Proper preparation is the cornerstone of any successful self-painting project. Skimping on preparation steps can lead to uneven finishes, poor adhesion, and a less durable result. A meticulous approach to gathering tools, cleaning the surface, protecting surrounding areas, and applying primer will ensure your painting efforts yield a smooth, professional, and long-lasting transformation.
Gathering Essential Tools
Before you even open a can of paint, it is crucial to assemble all the necessary tools. While paint and a brush might seem sufficient, achieving a meticulous and clean finish requires a few more items. Your essential toolkit should include:
- Paint: Of course, your chosen paint type and color.
- Brushes: Typically, brushes ranging from 1 to 1.5 inches are recommended for detailed work, such as corners, edges, and intricate areas that rollers cannot reach. These smaller brushes allow for precision and control.
- Rollers: For covering larger, flat surfaces like walls, rollers are indispensable. They allow for quick and even application of paint over broad areas, significantly speeding up the process compared to using only a brush.
- Paint Tray: A paint tray is essential for managing paint quantity. It helps you load the roller or brush evenly, preventing excessive paint buildup that can lead to drips and uneven patches.
- Masking Tape: This tape is used to protect specific areas that you don't want to paint, such as door frames, window sills, light switches, and electrical outlets. Applying masking tape carefully ensures crisp, clean lines and protects these fixtures from accidental paint splatters.
- Covering Tape: Also known as painter's plastic or drop cloths, covering tape is used to cover larger surfaces like floors, furniture, and adjacent walls that are not being painted. It provides a barrier against paint drips and splatters, keeping your workspace clean and protected.
Using these tools thoughtfully ensures that your painting project is not only efficient but also results in a polished and professional outcome.
Preparing the Surface
The condition of the surface you intend to paint directly impacts the final appearance of your project. Therefore, thorough surface preparation is a non-negotiable step.
First, clean the existing surface meticulously. Any dirt, dust, grease, or grime can prevent the paint from adhering properly, leading to peeling or an uneven finish. Use a damp cloth or a mild cleaning solution to wipe down walls and furniture, then allow them to dry completely. A clean surface ensures better paint adhesion and a smoother final look.
Second, address any imperfections on the wall. If your walls have nail holes, minor cracks, or uneven textures, these must be repaired to create a perfectly flat surface. For this, you will need 'putty' and a 'spatula.' Use the putty to fill in any holes or cracks, pressing it firmly into the damaged areas. Once applied, use the spatula to smooth out the putty, making it flush with the surrounding wall. After the putty has dried completely, gently sand the repaired areas with fine-grit sandpaper until they are perfectly smooth and level with the rest of the wall. This crucial step ensures that the paint goes on evenly, without highlighting any underlying imperfections.
If you are painting directly over existing wallpaper, inspect it carefully for any damage or loose sections. As mentioned earlier, if the wallpaper has scratches or imperfections, moisture from the paint can cause it to wrinkle, or the weight of the paint could lead to cracks Naver Blog: Self-Interior Paint Types and Methods. Ensure it is firmly attached and free from any tears or bubbles to prevent issues during painting.
Protecting Unpainted Areas
Once your surface is clean and smooth, the next critical step is to protect all areas that you do not wish to paint. This involves the careful application of masking tape and covering tape.
Masking tape should be applied along the precise boundary lines between walls, around door and window frames, light switches, electrical outlets, and any trim or molding that you want to keep its original color. The key to a clean finish is to press the masking tape down firmly, ensuring there are no gaps or loose edges where paint could seep underneath. A meticulous masking tape job is essential for achieving sharp, professional-looking edges.
Covering tape, or drop cloths, should be used to protect larger areas such as floors and adjacent walls that are not part of your painting project. Lay down drop cloths or plastic sheeting to cover the entire floor area beneath the wall you are painting. Extend covering tape along the edges of the ceiling and any walls that will not be painted to prevent accidental drips or splatters. This protective barrier is vital for keeping your home clean and free from paint stains. Taking the time to properly mask and cover will save you significant cleanup time later and ensure a polished result.
Applying Primer (Jesso)
A primer, often referred to as 'jesso' in Korean DIY contexts, is a thick, sticky paint-like substance that serves several important functions before the final coat of paint. Applying jesso is a highly recommended step, especially when painting over a dark or unevenly colored surface.
The primary roles of jesso include:
- Smoothing the surface: Jesso helps to create a uniform, smooth base, which is particularly beneficial for slightly textured walls or surfaces with minor imperfections.
- Covering existing colors: It acts as an opaque layer that effectively conceals the original color of the wall. If your existing wall color is dark or vibrant, applying jesso ensures that the new, lighter paint color will appear true to its shade without being influenced by the underlying hue. For very strong existing colors, applying 2-3 coats of jesso is recommended to ensure complete coverage and optimal color development for your new paint.
- Improving adhesion and color vibrancy: Jesso enhances the adhesion of the topcoat, meaning your paint will stick better and last longer. It also improves the vibrancy and true color payoff of your chosen paint, as it provides a neutral and consistent base.
After applying jesso, allow it to dry for approximately one hour before proceeding with your final paint application. This drying time ensures the primer has fully set and is ready to provide a stable foundation for the subsequent paint layers. When applying your final paint, manage the amount carefully to avoid leaving brush marks or roller lines. Use a roller for large wall sections and a brush for corners and contoured areas to achieve a clean, smooth finish. If the first coat of paint appears lighter than desired, applying 2-3 additional coats is recommended, ensuring each layer is applied carefully to prevent streaks or uneven patches.
What Are the Best Tips for Painting Wallpaper?
Painting over existing wallpaper is a popular self-interior technique that can refresh a room without the intensive labor of wallpaper removal. However, it requires careful execution to ensure a smooth, lasting finish. The success of painting wallpaper hinges on proper surface assessment, specific application techniques, and the right tools.
Assessing and Preparing Wallpaper for Painting
Before you begin painting, it is crucial to thoroughly inspect your existing wallpaper. The surface must be flat and free of any significant damage. Look for tears, peeling sections, bubbles, or deep scratches. If the wallpaper has sustained damage, or if it is loosely attached to the wall, painting over it can lead to problems. Moisture from the paint can cause the wallpaper to absorb water and wrinkle, creating an unsightly, uneven texture. Furthermore, the added weight of the paint can exacerbate existing adhesion issues, potentially causing the wallpaper to crack or peel away from the wall Naver Blog: Self-Interior Paint Types and Methods.
Address any minor imperfections by gently re-adhering loose sections with wallpaper adhesive, patching small tears, and smoothing out any bubbles. For significant damage or very old, delicate wallpaper, it might be more advisable to remove it entirely before painting, though this negates the ease of painting over it. Once any repairs are made and the surface is deemed stable, clean the wallpaper to remove any dust, dirt, or grease that could interfere with paint adhesion. A light wipe with a damp cloth and mild cleaner, followed by thorough drying, is usually sufficient. For older, silk wallpaper that has accumulated "hand marks" over 20 years, as one DIYer noted, painting can be an excellent, cost-effective alternative to full replacement Naver Blog: 7 Tips for Painting Wallpaper. This individual even primed beige switch covers with jesso before painting them white to match the newly painted walls, showing that careful preparation extends to all elements of the room.
Enhancing Application with a Spray Bottle
One "golden tip" for achieving a smooth and drip-free finish when painting wallpaper is to use a spray bottle. Instead of diluting the paint with water, which can sometimes lead to an inconsistent texture or reduced opacity, lightly mist the wallpaper surface with plain water just before applying the paint.
This technique serves several purposes:
- Improved Flow: The slight dampness on the wallpaper helps the paint glide on more smoothly and evenly.
- Reduced Dripping: By pre-dampening the surface, the paint is less likely to absorb too quickly in dry spots, which can cause it to clump or drip. It creates a more uniform absorption rate across the surface.
- Enhanced Adhesion: A lightly moistened surface can sometimes improve the paint's ability to bond with the wallpaper, leading to a more durable finish.
Many DIYers are surprised by how much easier and more professional the paint application becomes with this simple step. It allows the paint to spread effortlessly, resulting in a cleaner and more consistent coat.
Strategic Painting Techniques and Tools
Efficient painting involves using the right tools for different areas of the wall. Start by tackling the more challenging and intricate sections. Use a small brush or a pad brush to paint narrow areas, corners, and edges near the ceiling, floor, or around fixtures. These tools offer the precision needed to avoid getting paint on adjacent surfaces.
Once the detailed work is complete, switch to a roller or a paint pad for the larger, open wall surfaces. Paint pads are particularly recommended for wallpaper painting due to their ability to cover wide areas quickly and apply paint smoothly without excessive loading. One experienced DIYer even called the paint pad a "magic wallpaper painting tool," noting it is "incredibly fast and covers a large area in one go" compared to rollers or brushes Naver Blog: 7 Tips for Painting Wallpaper. They emphasized that since discovering paint pads, they only use them for wallpaper painting, reserving rollers for door painting.
When painting, maintain a steady hand and apply paint in even strokes. It's often better to apply multiple thin coats rather than one thick coat, as this reduces the risk of drips, streaks, and uneven drying. If painting near the ceiling, use a chair or ladder for easy and safe access. While anyone can be a beginner, wearing old clothes that you don't mind getting paint on is a practical tip, and having wet wipes on hand for immediate cleanup of accidental splatters can save a lot of trouble.
Project Timeline and Mindset
Painting wallpaper can be a surprisingly quick project. One DIY enthusiast set a goal of completing a small room's wallpaper painting in just 30 minutes. While distractions like creating a video and managing footage extended the project to 1 hour and 30 minutes, they affirmed that focusing solely on painting could indeed achieve the 30-minute goal Naver Blog: 7 Tips for Painting Wallpaper. This demonstrates the efficiency of wallpaper painting as a self-interior method.
For larger homes or multiple rooms, it is often more manageable to break down painting projects by type rather than by room. For example, focus on painting all doors in the house, then move on to all wallpapered walls. This approach can make the overall process feel less overwhelming and more efficient. Self-painting is described as a "small art" that allows you to slowly transform your home, fostering a sense of attachment to your living space and naturally encouraging organization and cleaning. "Wallpaper self-painting is truly the easiest self-painting method that can be completed in less than an hour. I'm releasing a video with easy-to-follow tips, so please watch and use it," said Hobakne, a DIY blogger, highlighting the accessibility and quick results of this method [Naver Blog: 7 Tips for Painting Wallpaper](https://m.blog.naver.com/isyoon71/221398747220].
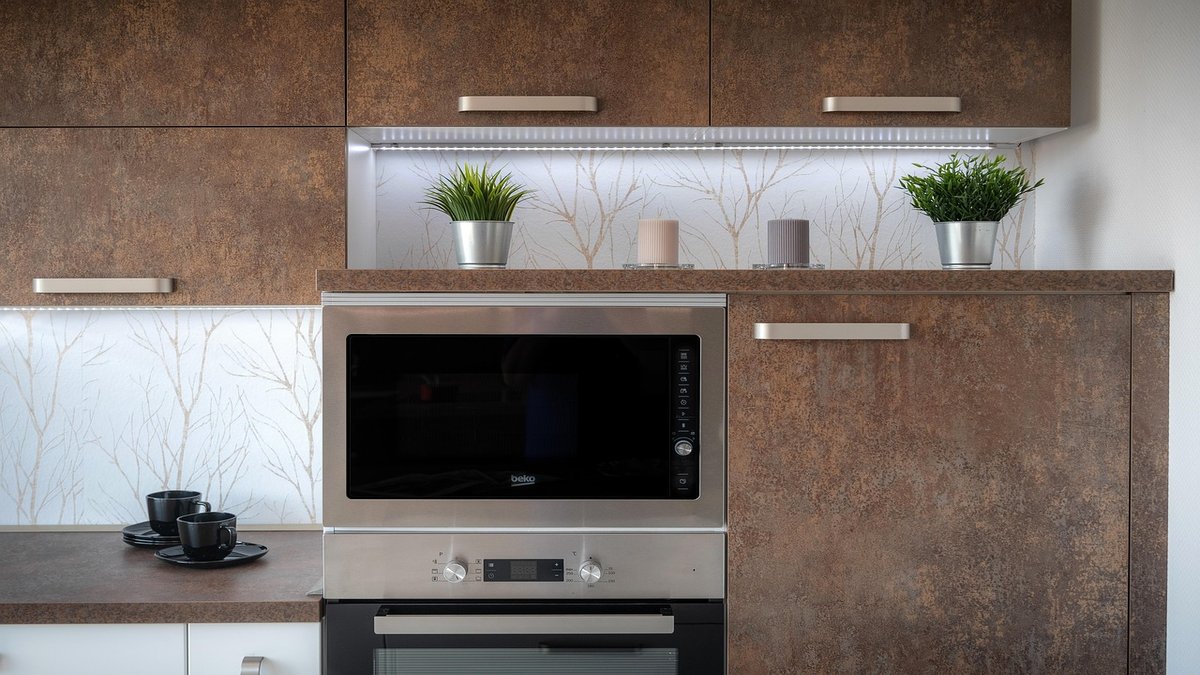
Can You Paint Kitchen Countertops?
Yes, transforming your kitchen countertops with paint is a viable option for a self-interior project, particularly if you have artificial marble surfaces. This method offers a cost-effective way to update the look of your kitchen without the expense and hassle of full countertop replacement. There are two primary approaches to painting kitchen countertops: applying a transparent hardening coating or opting for a colored finish using specialized paints.
Transparent Hardening Coating
One method for updating artificial marble countertops is to apply a transparent hardening coating. This approach typically involves a UV transparent coating system. The main benefit of a transparent coating is that it preserves the existing look and pattern of your artificial marble while providing a new, durable, and often glossy protective layer. This can be ideal if you are generally happy with the current aesthetics of your countertop but wish to enhance its resistance to wear, scratches, and stains.
The UV transparent coating method often involves specialized products that are cured using ultraviolet light, creating a very hard and resilient surface. This type of coating can significantly extend the lifespan of your countertop by adding an extra layer of protection against daily kitchen activities. It's a subtle yet effective way to rejuvenate your kitchen's focal point, giving it a fresh, polished appearance without altering its original design.
Colored Painting with All-Purpose Urethane
For those looking for a more dramatic transformation, colored painting is an excellent choice. This involves using specialized paints that are designed to adhere to a variety of challenging surfaces, including artificial marble countertops. The most recommended product type for this application is "all-purpose urethane" paint.
All-purpose urethane paints are highly versatile and are known for their exceptional adhesion to a wide array of materials. These include glass, tiles, stainless steel, non-ferrous metals (such as galvanized steel, white pipe, and galvanized pipe), bathtubs, plastics, steel, and crucially, artificial marble (sink countertops). This broad compatibility makes them an ideal solution for kitchen renovation, where different materials might be present.
These paints are available in various finishes, including glossy, matte, and semi-gloss, allowing you to achieve the exact aesthetic you desire for your kitchen. They also come in a wide range of colors, giving you complete freedom to match your new countertops with your kitchen's overall design scheme. Popular product names for these types of paints, depending on the manufacturer, include 만능우레탄 (Manneung Urethane), 매직탄 (Magic Tan), 센스탄 (Sense Tan), 에바탄 (Evatan), and 모아코트 (Moa Coat).
However, it is important to be aware that all-purpose urethane paints are typically two-part oil-based coatings. This means they require mixing two components before application and they produce a strong odor. Adequate ventilation is essential during and after application to dissipate the fumes. Despite the smell and the two-part mixing process, their superior adhesion and durability make them a top choice for high-traffic surfaces like kitchen countertops, ensuring a long-lasting and beautiful finish. A Naver Q&A post from March 23, 2025, with 83 views, specifically addresses painting kitchen countertops, confirming the use of "all-purpose urethane" products for artificial marble, illustrating the active interest in this DIY solution Naver Q&A: Self-Interior Paint Inquiry.
Why Use Adhesive Thermal Wallpaper?
Adhesive thermal wallpaper, or insulating wallpaper, is a practical and increasingly popular self-interior solution, especially in older homes or those prone to temperature fluctuations. It offers a convenient way to enhance a home's energy efficiency and improve comfort by directly addressing issues like drafts and mold. This specialized wallpaper is distinct from traditional paper-based options, providing both functional and aesthetic benefits.
Combating Drafts and Improving Insulation
One of the primary reasons to use adhesive thermal wallpaper is its ability to insulate against drafts and improve a room's thermal performance. Homes, particularly older detached houses or those located on the top floor of an apartment building with direct exposure to outside elements (like a southwest-facing end unit in a 30-year-old apartment), often suffer from significant heat loss through walls and windows. This leads to uncomfortable cold spots and increased heating bills during colder months.
Adhesive thermal wallpaper is specifically designed to counteract this. It typically features a multi-layered structure, often composed of foamed polyethylene with vinyl film on one side and aluminum foil on the other. This construction creates a barrier that helps retain warmth inside the room and block cold air from entering. The aluminum film, sometimes referred to as a "thermal reflective insulation material," plays a crucial role by reflecting radiant heat, further enhancing the insulation effect Salty Living: Adhesive Thermal Wallpaper Review. This makes it an excellent choice for rooms that feel cold in winter or hot in summer due to poor wall insulation. One blogger living in a 1st-floor detached house with a family bedroom directly facing a mountain, noted a persistent issue with drafts from the window and wall during winter, which their existing white silk wallpaper couldn't address Naver Blog: Adhesive Thermal Wallpaper Review. Adhesive thermal wallpaper provided the solution, offering both insulation and a consistent aesthetic.
Preventing Mold Growth
Another significant advantage of adhesive thermal wallpaper is its resistance to mold. Traditional wallpapers, which often contain paper components, can be susceptible to mold growth, especially in areas with high humidity or where condensation (dew formation) occurs due to temperature differences between the inside and outside of a wall. Such condensation creates a damp environment, perfect for mold to thrive, leading to unsightly stains and potential health issues.
Adhesive thermal wallpaper, being made of chemical materials like foamed polyethylene and vinyl/aluminum films, contains no paper components. This inherent characteristic makes it highly resistant to mold. For walls that have previously suffered from mold due to condensation, switching to thermal wallpaper can be a welcome change, as it helps maintain a cleaner and healthier indoor environment. Furthermore, its surface is often easy to clean; if it gets dirty, a simple wipe with a wet cloth is usually enough to restore its cleanliness Salty Living: Adhesive Thermal Wallpaper Review. This ease of maintenance further contributes to a hygienic living space.
Material Composition and Thickness
The effectiveness of adhesive thermal wallpaper stems from its specific material composition. It is essentially a "sponge" with vinyl on one side and aluminum foil on the other, both attached to a foamed polyethylene core. The thickness of these wallpapers often plays a direct role in their insulating capability. Products like "Ttasaroom silk thermal wallpaper" are described as being 5mm thick, made of high-density foam, which significantly contributes to their thermal insulation effect Naver Blog: Adhesive Thermal Wallpaper Review.
Some variants of thermal wallpaper even feature aluminum film on both sides, which, while about 10,000 won more expensive per 20m roll, offers enhanced heat reflection and insulation Salty Living: Adhesive Thermal Wallpaper Review. This dual-sided reflective layer can further improve the wallpaper's performance in extreme conditions. The embossed printed film on the outer surface also provides a natural, aesthetic feel, allowing it to blend seamlessly with existing silk wallpaper, as noted by one user who found it perfectly matched their original decor [Naver Blog: Adhesive Thermal Wallpaper Review](https://m.blog.naver.com/king0655/221456349911].
While highly beneficial, it's important to acknowledge one potential drawback: because thermal wallpaper is made of chemical materials, it can be more vulnerable to fire compared to traditional paper-based options. Also, the range of colors and patterns available for thermal wallpaper may not be as extensive as for silk wallpaper, which offers more diverse aesthetic choices Salty Living: Adhesive Thermal Wallpaper Review. Despite these considerations, for homes battling drafts, mold, and high heating costs, adhesive thermal wallpaper presents a compelling and effective DIY solution.
How Easy is it to Install Adhesive Thermal Wallpaper?
One of the most appealing aspects of adhesive thermal wallpaper for self-interior enthusiasts is its remarkable ease of installation. Designed with the DIYer in mind, these wallpapers eliminate many of the complexities and messes associated with traditional wallpapering, making home insulation upgrades accessible to almost anyone. The straightforward application process means that special skills or extensive experience are not required, allowing homeowners to complete projects quickly and efficiently.
Simple Peel-and-Stick Application
The defining feature of adhesive thermal wallpaper is its peel-and-stick design. Unlike conventional wallpapers that require messy flour paste or other adhesives, thermal wallpaper comes with a pre-applied, strong adhesive backing. To install, you simply peel off the transparent protective film from the back of the wallpaper and press it directly onto the wall surface. This intuitive process removes the need for separate gluing, reducing preparation time and eliminating the potential for sticky residue or uneven application of paste.
This "no-fuss" method is particularly advantageous for busy individuals or families with children. As one blogger noted, "With kids around, timing is everything," and the ability to quickly apply the wallpaper without waiting for glue to dry or worrying about children touching wet adhesive was a significant benefit Naver Blog: Adhesive Thermal Wallpaper Review. The simplicity means that a significant home improvement project, such as insulating a room, can be completed in a short amount of time, perhaps over a weekend, without disrupting daily routines too much.
Strong and Reliable Adhesion
Despite the ease of application, the adhesive on these thermal wallpapers is designed to be powerful and long-lasting. Once applied, the strong bond ensures that the wallpaper stays firmly in place, without peeling or falling off. This robust adhesion provides peace of mind, knowing that your DIY insulation effort will remain effective for years to come. The confidence in its staying power means you won't have to worry about the wallpaper coming loose, even in areas with temperature fluctuations or minor humidity.
The quality of the adhesive is a critical factor, especially for a product intended to provide long-term insulation and mold prevention. A reliable bond means the thermal barrier remains intact, consistently delivering its benefits. This strong adhesive also contributes to the overall neatness of the finish, as tightly adhered wallpaper is less likely to show bubbles or gaps over time.
No Special Skills Required
A significant barrier for many contemplating DIY home projects is the perceived need for specialized skills or tools. Adhesive thermal wallpaper breaks down this barrier. The installation process is so straightforward that it genuinely requires no advanced technical skills. What is needed, however, is patience and attention to detail. Carefully measuring, cutting straight lines, and smoothing out the wallpaper during application are key to achieving a professional-looking finish.
While no special expertise is required, a methodical approach ensures the best results. Taking your time to align each strip, press out any air bubbles, and trim edges precisely will lead to a clean and seamless look. This accessibility makes adhesive thermal wallpaper an empowering option for anyone, regardless of their DIY experience level, to undertake a meaningful home improvement project that enhances both comfort and energy efficiency.
Aesthetic Options
Beyond its functional benefits and ease of installation, adhesive thermal wallpaper also offers various aesthetic choices to complement different interior styles. While the range of patterns might be less diverse than traditional decorative wallpapers, there are still appealing color options available. Commonly, you can find adhesive thermal wallpaper in colors such as white, silver, beige, light green, and pink Naver Blog: Adhesive Thermal Wallpaper Review.
These color choices, often neutral or soft, are designed to blend seamlessly with existing decor or to create a fresh, clean backdrop for a new design scheme. The outer surface often features an embossed printed film, which gives it a natural, textured feel, mimicking the look of traditional silk wallpaper. This means you don't have to sacrifice aesthetics for functionality, allowing you to achieve a beautiful and well-insulated home with relative ease.
Frequently Asked Questions
Is self-painting cheaper than traditional wallpapering?
Yes, self-painting is generally cheaper than traditional wallpapering. The materials for paint are often more affordable than wallpaper, and the DIY nature of painting eliminates labor costs associated with professional wallpaper installation. This makes it a cost-effective option for home updates, allowing for precise color expression and avoiding separate molding finishes for increased efficiency Naver Blog: Self-Interior Paint Types and Methods.
What are the main differences between water-based and oil-based paints?
Water-based paints are affordable, dry quickly, and have low odor, making them ideal for indoor use, though they may require additional coating for durability. Oil-based paints are more expensive, dry slowly, and have a strong odor but offer superior durability, weather resistance, and vivid color payoff, making them suitable for outdoor or high-wear areas Naver Blog: Self-Interior Paint Types and Methods.
Do I need to use a primer (jesso) before painting my walls?
Yes, using a primer, or "jesso," is highly recommended before painting your walls. Jesso helps smooth the wall surface, covers existing colors (especially dark ones, often requiring 2-3 coats), and significantly improves paint adhesion and color vibrancy. After applying jesso, you should let it dry for about an hour before applying paint Naver Blog: Self-Interior Paint Types and Methods.
Can I paint over existing wallpaper, or should I remove it first?
You can paint over existing wallpaper, but careful preparation is crucial. Ensure the wallpaper surface is flat and free of damage, as moisture from the paint or the paint's weight can cause wrinkling or cracking. Lightly misting the wallpaper with a spray bottle before painting can help the paint apply smoothly without dripping. One DIYer completed a small room's wallpaper painting in 1 hour and 30 minutes, aiming for 30 minutes (published 2018) [Naver Blog: 7 Tips for Painting Wallpaper](https://m.blog.naver.com/isyoon71/221398747220].
What are the benefits of using adhesive thermal wallpaper?
Adhesive thermal wallpaper helps insulate against drafts and prevents mold growth because it contains no paper components. It is often made of foamed polyethylene with vinyl and aluminum foil, with products available in 5mm thickness for good insulation. These are designed for easy peel-and-stick installation without special skills and come in colors like white, silver, beige, light green, and pink Naver Blog: Adhesive Thermal Wallpaper Review.
— The Self Interior Team
Related Reading
- Best Korean Interior Apps and Where to Shop
- Best Korean Interior Lighting Brands
- Best Korean Kitchen Cabinet Brands
- Best Korean Kitchen Faucet Brands
- Best Korean Wallpaper Removal Methods