How to Paint a Korean Apartment Wall Yourself
- Painting a wall is often easier and cheaper than wallpapering, making it a popular DIY option for Korean apartments (translated from Korean) Naver Blog: Self-Interior Paint Types and Methods.
Last updated: April 2026
Affiliate Disclosure: We may earn a commission when you purchase through our links. This does not affect our editorial independence.
Quick Answer
- Painting a wall is often easier and cheaper than wallpapering, making it a popular DIY option for Korean apartments (translated from Korean) Naver Blog: Self-Interior Paint Types and Methods.
- Water-based paints are generally suitable for indoor use, offering quick drying and low odor (translated from Korean).
- Applying paint directly over existing wallpaper can lead to issues like wallpaper damage or cracking if the surface isn't smooth (translated from Korean).
- A self-painting project can take as little as 30 minutes if focused, though a reviewer noted it took 1 hour and 30 minutes for their 20-year-old wallpaper (translated from Korean) Naver Blog: 7 Tips for Wallpaper Self-Painting.
Undertaking a do-it-yourself (DIY) wall painting project in a Korean apartment offers a straightforward and cost-effective approach to interior renovation. Compared to wallpapering, painting is generally considered easier to access and more affordable for individuals looking to update their living spaces Naver Blog: Self-Interior Paint Types and Methods. This method allows for precise expression of desired colors and often requires no separate molding finish, which saves time and increases efficiency. However, careful preparation is key, especially when painting over existing wallpaper, as an uneven surface can lead to issues like the wallpaper becoming wrinkled from moisture or cracking under the paint's weight. With the right tools and techniques, a focused self-painting task can be completed in as little as 30 minutes, although a blogger who painted their 20-year-old silk wallpaper noted it took them 1 hour and 30 minutes, partly due to filming the process (translated from Korean) Naver Blog: 7 Tips for Wallpaper Self-Painting.
Why Choose DIY Wall Painting for Your Korean Apartment?
DIY wall painting is a highly recommended approach for renovating Korean apartment interiors due to its cost-effectiveness, ease of execution, and the creative freedom it provides. Many find it simpler to manage than traditional wallpapering, making it an ideal entry point into self-interior projects. The materials for painting are typically more affordable than those for wallpaper installation, and the application process itself is often less complex, allowing even beginners to achieve professional-looking results. This method gives you the power to choose the exact shade you envision, ensuring your space perfectly reflects your personal style.
One of the significant advantages of painting is the ability to achieve precise color expression. Unlike pre-patterned or limited-color wallpapers, paint can be mixed to virtually any hue, offering endless possibilities for customizing your apartment's aesthetic. This flexibility is crucial for homeowners who want to create a unique atmosphere or match specific design elements within their space. Furthermore, painting eliminates the need for a separate molding finish, which is often a time-consuming and intricate part of wallpaper installation. This streamlined process saves considerable time and boosts efficiency, making DIY painting a practical choice for busy individuals.
The low barrier to entry also makes painting an attractive option. If the surface you plan to paint is flat and suitable for painting—whether it's a wall, wood, or furniture—most people can successfully complete the project themselves. The process is forgiving, and minor mistakes can often be corrected, which is not always the case with wallpaper. Painting also serves a dual purpose: it protects the underlying material with properties like waterproofing and anti-bacterial agents, while simultaneously enhancing the aesthetic value of the space through color. It acts as a durable interior finishing material that combines both protective function and decorative appeal.
However, it's crucial to acknowledge certain considerations. For instance, the surface to be painted must be flat and even. If you plan to paint over existing wallpaper, you need to be cautious. The weight of the paint or the moisture absorbed by the wallpaper can cause it to wrinkle or crack, damaging the wallpaper underneath. Therefore, a thorough inspection and preparation of the existing surface are paramount to ensure a smooth and lasting finish. Despite these points, the overall consensus among DIY enthusiasts in Korea is that painting offers an accessible and rewarding path to transforming your apartment.
For those interested in exploring self-interior projects, painting often stands out as one of the easiest and most impactful changes one can make. As one expert from Igeon Design, an interior construction company with 20 years of experience, notes, "Painting is often easier and more affordable than wallpapering for interior renovations, making it a popular DIY option for Korean apartments" (translated from Korean) Naver Blog: Self-Interior Paint Types and Methods. This sentiment underscores the accessibility and practicality of painting for apartment dwellers looking to refresh their homes without extensive professional help. The ability to directly influence the visual appeal of a large surface area with a relatively simple process makes it a go-to choice for many.
The efficiency of painting also extends to its application on various materials. While it's commonly applied to walls, suitable paints can also be used on wooden fixtures, furniture, and other surfaces, allowing for a cohesive design theme throughout the apartment. This versatility means that a single painting project can transform multiple elements within a room, creating a unified and refreshed look. The absence of complex installation procedures, such as those involved in precise wallpaper alignment or specialized adhesive application, further simplifies the process. This makes it an attractive option for individuals who value both aesthetic improvement and practical execution.
Ultimately, choosing DIY wall painting for your Korean apartment is a decision that offers a compelling blend of benefits. It is a creative outlet that allows for personal expression, a cost-effective alternative to professional renovations, and a relatively straightforward process that many can undertake successfully. By understanding the types of paint available and the necessary preparation steps, apartment residents can confidently embark on a painting project that revitalizes their living space. The emphasis on individual control over color and finish, combined with the practical advantages of reduced cost and time, solidifies its position as a favored method for self-interior decoration.
What Types of Paint Are Available for Interior Walls?
When embarking on a DIY wall painting project in a Korean apartment, understanding the different types of paint is crucial for selecting the right product for your specific needs. The primary categories of paint available are water-based, oil-based, and eco-friendly, each offering distinct characteristics in terms of application, drying time, odor, durability, and suitability for various environments. Choosing the correct paint ensures both a beautiful finish and long-lasting results.
Water-Based Paint (수성페인트)
Water-based paint, known as su-seong pe-in-teu (수성페인트) in Korean, is diluted with water, making it easy to apply. It is characterized by its affordability, fast drying time, and low odor, which makes it highly suitable for indoor use in apartments. These qualities contribute to a more comfortable painting experience, as the quick drying minimizes disruption, and the reduced fumes are less irritating, especially in enclosed living spaces. However, traditional water-based paints tend to have weaker durability and water resistance compared to oil-based options, potentially requiring additional coating layers for enhanced protection.
Modern advancements in water-based paint technology have addressed some of these limitations. Today, many water-based paints incorporate materials like acrylic emulsion, enamel emulsion, or hydrophilic synthetic resins. These components form a stronger film as the water evaporates, significantly improving the paint's water resistance and overall durability. Despite these improvements, it's important to note that water-based paints can be susceptible to mold or rust in high-humidity environments, and stains can be difficult to remove once they set. This makes careful application and proper environmental control important for maintaining the paint's integrity over time.
Oil-Based Paint (유성페인트)
Oil-based paint, or yu-seong pe-in-teu (유성페인트), is diluted with thinners or volatile solvents. This type of paint typically has a longer drying time and a stronger odor compared to water-based paints. The solvents used for dilution are highly flammable, necessitating extreme caution to avoid exposure to open flames during application and drying. Despite these drawbacks, oil-based paints are highly versatile and can be applied to a wide range of surfaces, including wood and metal, making them a popular choice for various renovation projects.
Oil-based paints are renowned for their excellent weather resistance (nae-hu-seong or 내후성), meaning they can withstand exposure to light, wind, humidity, and other climatic conditions without significant wear or degradation. They are also highly resistant to abrasion and produce vibrant, clear colors. Variations of oil-based paints include urethane, epoxy, lacquer, and enamel, each formulated for specific applications and offering different levels of durability and finish. For instance, urethane paints are often used for floors due to their toughness, while enamel paints provide a hard, glossy finish.
Eco-Friendly Paint (친환경페인트)
Eco-friendly paint, or chin-han-gyeong pe-in-teu (친환경페인트), is designed to contain no or minimal harmful substances. This makes it an excellent choice for households with children, pets, or individuals with sensitive skin or respiratory conditions. While similar in many respects to water-based paints, the key differentiator is the strict control over volatile organic compounds (VOCs) and other toxins. These paints prioritize health and safety without compromising on aesthetic quality or performance.
Many eco-friendly paints are water-based formulations that have undergone additional testing and certification to ensure they meet stringent environmental and health standards. They offer the same benefits as standard water-based paints—such as ease of application, quick drying, and low odor—but with the added assurance of reduced chemical exposure. For example, Igeon Design, a company with 20 years of interior experience, offers eco-friendly paint options for their clients, emphasizing direct selection and application to meet specific needs (translated from Korean) Naver Blog: Self-Interior Paint Types and Methods. This highlights the growing demand for safer painting solutions in Korean homes.
When considering which paint type to use, reflect on the specific area you are painting, the desired durability, and any health considerations. For most interior walls in a Korean apartment, water-based or eco-friendly paints are generally the best choice due to their low odor and quick drying times. For surfaces like kitchen countertops, special paints are needed. For kitchen sink countertops made of artificial marble, there are two primary methods: a transparent hardening coating using a UV transparent coating, or colored painting using an "all-purpose urethane" product. These "all-purpose urethane" paints are 2-component oil-based products known for their strong odor but superior adhesion to various materials, including glass, tiles, stainless steel, non-ferrous metals, bathtubs, plastics, iron, and artificial marble Naver Kin: Self-Interior Paint Questions. They are available in various sheens (glossy, matte, semi-gloss) and colors, sold under brand names like Manneung Urethane, Magictan, Senstan, Evatan, and Moacoat (translated from Korean) Naver Kin: Self-Interior Paint Questions. This specialized paint ensures durability and proper adherence to non-traditional surfaces.
What Tools Do You Need for Self-Painting?
To achieve a clean and professional finish when painting your Korean apartment walls yourself, having the right set of tools is just as important as choosing the right paint. While it might seem like you only need paint and a brush, a few additional items will make the process smoother, cleaner, and more efficient. These tools help protect unpainted areas, ensure even application, and allow for precise detailing.
Essential Painting Tools
The fundamental tools for any painting project include:
- Paint: The most obvious item, chosen based on the type of surface and desired finish (water-based, oil-based, eco-friendly).
- Brushes: Essential for detailed work, corners, and curved surfaces where a roller cannot reach. Brushes typically come in various sizes, with 1 to 1.5 inches recommended for fine detail work and edge finishing. Having a couple of different sizes can be beneficial for tackling different areas.
- Rollers: These are indispensable for painting large, flat wall surfaces quickly and evenly. Rollers allow for a consistent application of paint, reducing brush marks and ensuring a smooth finish across expansive areas. Different nap lengths are available for various paint types and surface textures.
- Paint Tray: A paint tray is crucial for controlling the amount of paint loaded onto your roller or brush. It helps distribute the paint evenly, preventing clumps and drips, which can lead to an uneven finish. The ribbed surface of the tray also helps remove excess paint.
Protective Gear and Preparation Tools
Beyond the core painting tools, several items are vital for protecting your space and ensuring a clean application:
- Masking Tape: This tape is used to cover and protect areas that you don't want to paint, such as the borders between walls, door frames, window sills, electrical outlets, and light switches. Applying masking tape meticulously is critical for achieving sharp, clean lines and a neat finish. Without careful application, paint can bleed underneath, creating messy edges.
- Covering Tape: This wider, often pre-taped plastic sheeting is used to cover larger areas like floors, furniture, and adjacent walls that you want to shield from paint splatters. It acts as a protective barrier, preventing accidental paint drops or sprays from damaging surfaces not intended for painting. Using covering tape helps maintain cleanliness throughout the painting process.
- Putty and Spatula (헤라): If your walls have imperfections like nail holes, cracks, or uneven textures, putty (also called joint compound) is used to fill these gaps. A spatula, or hera (헤라), helps apply the putty smoothly and scrape away excess, creating a flat surface. After the putty dries, a light sanding with sandpaper ensures the surface is perfectly smooth for painting.
- Sandpaper: Used after applying putty to gently smooth out any rough patches or unevenness, ensuring the wall surface is perfectly flat and ready for paint.
Additional Helpful Items
While not strictly mandatory, these items can significantly improve your painting experience:
- Spray Bottle: For painting over wallpaper, a spray bottle filled with water can be a game-changer. Lightly misting the wallpaper before applying paint helps the paint spread more smoothly and prevents it from dripping, leading to a cleaner, more even finish (translated from Korean) Naver Blog: 7 Tips for Wallpaper Self-Painting.
- Paint Pad: A paint pad is a flat tool with a handle, covered in a soft, absorbent material. It's particularly effective for wallpaper painting, as it can cover large areas quickly and evenly, often more efficiently than a roller or brush for this specific task. One blogger highly recommends paint pads for wallpaper, stating, "Paint pads are truly optimized for wallpaper painting... I always use this for wallpaper painting" (translated from Korean) Naver Blog: 7 Tips for Wallpaper Self-Painting.
- Ladder or Stool: Essential for reaching high areas near the ceiling or in corners, ensuring safe and comfortable application without straining.
- Wet Wipes: Keep a supply of wet wipes handy for immediate clean-up of any accidental spills or splatters on surfaces or your skin. Prompt removal of fresh paint is much easier than tackling dried stains.
- Old Clothes: Wear clothes that you don't mind getting paint on. Even with careful preparation, accidents can happen. One blogger shared their experience, "I ruined a few clothes at first," emphasizing the practicality of wearing disposable attire (translated from Korean) Naver Blog: 7 Tips for Wallpaper Self-Painting.
By gathering these tools before you start, you'll be well-prepared to tackle your DIY wall painting project with confidence, ensuring a smooth process and a beautiful, lasting result for your Korean apartment.
How Do You Prepare Your Walls for Painting?
Proper wall preparation is the cornerstone of any successful painting project, especially in a Korean apartment where walls might have existing wallpaper or minor imperfections. Skipping this crucial step can lead to a less-than-perfect finish, with paint peeling, cracking, or uneven application. Taking the time to prepare your walls thoroughly will ensure that your paint adheres well, looks smooth, and lasts longer.
Cleaning the Surface
The first step in wall preparation is to thoroughly clean the existing wall surface. Dust, grime, grease, and other residues can prevent paint from adhering properly, leading to an uneven or patchy finish. Use a damp cloth or a mild cleaning solution to wipe down the entire surface you intend to paint. Ensure the wall is completely dry before moving on to the next steps. A clean surface is essential for a pristine paint job. If the wall is not properly cleaned, the paint may not stick, resulting in a messy outcome after application (translated from Korean) Naver Blog: Self-Interior Paint Types and Methods.
Repairing Imperfections
After cleaning, inspect your walls for any imperfections such as nail holes, small cracks, or uneven areas. These flaws will be more noticeable once painted, so it's important to address them beforehand.
- Filling Holes and Cracks: Use putty (or joint compound) to fill any holes or cracks. Apply the putty with a spatula (헤라), ensuring it is pressed firmly into the imperfection and then smoothed level with the surrounding wall surface.
- Smoothing the Surface: Once the putty has dried completely, gently sand the repaired areas with fine-grit sandpaper. This creates a perfectly flat and smooth surface that will seamlessly blend with the rest of the wall once painted. The goal is to make the surface as level as possible before painting (translated from Korean) Naver Blog: Self-Interior Paint Types and Methods.
Painting Over Existing Wallpaper
Painting directly over existing wallpaper is a common practice in DIY projects, but it requires careful consideration.
- Inspect the Wallpaper: Before applying any paint, thoroughly inspect the existing wallpaper for any damage, loose seams, bubbles, or peeling sections. If the wallpaper is in poor condition, painting over it can exacerbate these issues.
- Moisture and Weight Concerns: As mentioned, wallpaper can absorb moisture from the paint, causing it to wrinkle or buckle. The added weight of the paint can also cause the wallpaper to tear or crack. These issues are more likely to occur if the wallpaper is old, thin, or not properly adhered to the wall. For example, a blogger who painted over 20-year-old silk wallpaper noted that while it seemed acceptable from a distance, up close, the age was apparent, hinting at the need for thorough inspection (translated from Korean) Naver Blog: 7 Tips for Wallpaper Self-Painting. If the existing wallpaper has scratches or is not firmly attached, these problems can arise. It's crucial to check for any existing damage before proceeding (translated from Korean) Naver Blog: Self-Interior Paint Types and Methods.
- Alternative: Insulation Wallpaper: For homes, particularly older apartments or single-family homes, that suffer from drafts (oe-pung or 외풍) or cold walls, an alternative to traditional wallpaper or paint is adhesive insulation wallpaper. This type of wallpaper, often 5mm thick with high-density foam, provides significant thermal insulation. It typically features an aluminum heat-reflecting layer on the back, which reflects radiant heat, and a strong adhesive for easy peel-and-stick application. This can be a good choice if your primary concern is insulation and you want to avoid the mess of traditional painting and wallpapering. While effective for insulation and preventing mold due to its non-paper composition, insulation wallpaper has a more limited range of colors compared to silk wallpaper and is susceptible to fire due to its chemical composition (translated from Korean) Naver Blog: Adhesive Insulation Wallpaper Review, Tistory: Adhesive Insulation Wallpaper Effect Review.
Taping and Covering
This is a critical step for a clean, professional finish.
- Masking Tape Application: Carefully apply masking tape along the edges of adjacent walls, ceilings, door frames, window casings, and around electrical outlets and light switches. Press the tape firmly to ensure a tight seal, preventing paint from seeping underneath. The neatness of your masking tape application directly impacts the crispness of your paint lines. "Thorough masking tape application is necessary for a neat finish," advises one guide (translated from Korean) Naver Blog: Self-Interior Paint Types and Methods.
- Covering Tape for Protection: Use covering tape (plastic sheeting with an adhesive edge) to protect larger areas. Cover floors, furniture, and any wall sections you don't intend to paint. This prevents paint splatters and drips from marking unwanted surfaces, making clean-up much easier after the painting is complete.
By diligently following these preparation steps, you lay the groundwork for a successful and aesthetically pleasing DIY wall painting project in your Korean apartment. This attention to detail will pay off with a smooth, durable, and professional-looking finish that enhances your living space.
When Should You Use Primer (Gesso) Before Painting?
Using a primer, often referred to as gesso (젯소) in Korea, is a crucial step that can significantly impact the quality and longevity of your paint job. While it might seem like an extra step, applying gesso can save you time and frustration in the long run, especially when dealing with challenging wall surfaces or dramatic color changes. Gesso is a thick, sticky paint-like substance that serves multiple purposes in wall preparation.
The Role of Gesso
Gesso, or primer, plays a vital role in preparing your walls for paint by creating an optimal surface for adhesion and color development. Its primary functions include:
- Smoothing the Surface: Gesso helps to create a smoother and more uniform surface, filling in minor imperfections and creating a consistent texture for the topcoat. It acts as a base layer that evens out the wall.
- Covering Existing Colors: One of gesso's most important functions is to cover the existing wall color. This is particularly useful when you are painting a light color over a dark or vibrant existing color. Gesso creates a neutral base, preventing the old color from showing through the new paint.
- Improving Adhesion and Bonding: Gesso significantly enhances the adhesion and bonding properties of the final paint coat. It creates a surface that paint can grip onto more effectively, reducing the likelihood of peeling or chipping. This improved adhesion contributes to a more durable finish.
- Enhancing Color Development: By providing a clean, consistent base, gesso allows the true color of your topcoat to develop vibrantly. Without gesso, especially over a dark or unevenly colored wall, the final paint color might appear dull, streaky, or different from its intended shade.
When to Use Gesso
While not always strictly necessary, using gesso is highly recommended in several scenarios to ensure the best possible outcome for your painting project:
- Dramatic Color Changes: If you are planning to paint a light color over a significantly darker or brighter existing wall color, gesso is almost indispensable. It helps to block out the old color, preventing it from bleeding through and requiring fewer coats of your new, more expensive paint. If the existing color is dark and you're worried the new paint won't show up well, applying 2-3 coats of gesso is recommended (translated from Korean) Naver Blog: Self-Interior Paint Types and Methods.
- Painting Over Stained or Damaged Walls: Walls with water stains, smoke damage, or other difficult-to-cover marks will benefit greatly from a coat of gesso. It acts as a barrier, preventing these stains from seeping through the new paint.
- Painting Over Glossy Surfaces: If you are painting over a glossy or semi-gloss finish, gesso helps to create a duller, more porous surface that your new paint can adhere to. Without it, the new paint might struggle to stick and could easily scratch or peel.
- Painting Over Bare Drywall or New Plaster: For newly installed drywall or plaster, gesso seals the porous surface, preventing the paint from being absorbed unevenly and ensuring a consistent finish.
- Painting Over Wallpaper (especially old or patterned): When painting over existing wallpaper, particularly if it's old, textured, or has a strong pattern, gesso helps to smooth the surface and provide an even base. It also helps to seal the wallpaper, reducing the risk of it bubbling or peeling due to moisture from the paint. One blogger, painting over 20-year-old silk wallpaper, likely benefited from a primer to ensure a consistent base, although they mentioned priming switch covers separately (translated from Korean) Naver Blog: 7 Tips for Wallpaper Self-Painting.
- Painting Over Different Materials: When transitioning from one material to another, such as painting a wall that partially covers wood or metal, gesso provides a uniform base that helps the paint adhere consistently across different surfaces.
Application and Drying Time
Applying gesso is similar to applying paint. Use a roller for large areas and a brush for edges and corners. It's generally recommended to apply gesso in thin, even coats to avoid drips and ensure proper drying. After applying gesso, allow it to dry for approximately 1 hour before applying your first coat of paint (translated from Korean) Naver Blog: Self-Interior Paint Types and Methods. This drying time ensures that the gesso has properly cured and can provide an effective base. In cases where the existing color is very dark or the surface is particularly problematic, applying 2-3 coats of gesso may be necessary, allowing adequate drying time between each coat.
In summary, while it adds an additional step to your painting process, using gesso is a worthwhile investment. It improves the final appearance of your walls, enhances the durability of your paint job, and can ultimately reduce the number of topcoats required, saving you both paint and effort. For a long-lasting and professional-looking finish in your Korean apartment, integrating gesso into your wall preparation routine is a smart decision.
What Are Some Expert Tips for Flawless Self-Painting?
Achieving a flawless finish when self-painting your Korean apartment walls goes beyond just having the right tools and paint. Incorporating expert tips and techniques can make a significant difference, transforming a basic paint job into a professional-looking result. These insights, gleaned from experienced DIYers and professionals, focus on efficiency, precision, and common pitfalls to avoid.
Smart Application Techniques
- Mist Wallpaper Before Painting: A unique tip for painting over wallpaper is to lightly mist the surface with water using a spray bottle before applying paint. This technique helps the paint spread more smoothly and prevents it from dripping, resulting in a cleaner and more even application (translated from Korean) Naver Blog: 7 Tips for Wallpaper Self-Painting. The blogger who shared this tip expressed surprise at how soft and well the paint applied. This can be particularly beneficial for older wallpapers that might be less absorbent.
- Paint Narrow Areas First: Begin your painting process by tackling the narrow, detailed, and intricate areas first. Use a brush or a small pad brush for corners, edges, and around fixtures. Once these precise areas are completed, you can move on to the larger surfaces. This method ensures that you achieve clean lines and thorough coverage in hard-to-reach spots before rolling the main sections.
- Utilize Paint Pads for Large Surfaces: For wide, flat wall areas, paint pads are often more efficient than rollers or brushes, especially when painting over wallpaper. A paint pad can cover a significant surface area quickly and evenly. One experienced DIYer emphatically stated, "Paint pads are truly optimized for wallpaper painting... I always use this for wallpaper painting" (translated from Korean) Naver Blog: 7 Tips for Wallpaper Self-Painting. They noted that paint pads allow for much faster coverage than rollers or brushes.
- Control Paint Quantity: When using a roller or brush, avoid loading too much paint at once. Excessive paint can lead to drips, streaks, and an uneven finish. Use a paint tray to regulate the amount of paint on your tool, ensuring a thin, even coat. Applying too much paint in one go can leave marks, so proper quantity control is essential (translated from Korean) Naver Blog: Self-Interior Paint Types and Methods.
Achieving Desired Color and Finish
- Multiple Thin Coats: Instead of trying to achieve full coverage with one thick coat, apply multiple thin coats of paint. This approach leads to a smoother, more durable finish and reduces the risk of drips and unevenness. If the color appears lighter than your desired shade after the first coat, applying 2-3 additional coats is recommended (translated from Korean) Naver Blog: Self-Interior Paint Types and Methods. Ensure each coat dries completely before applying the next.
- Watch for Streaks and Uneven Spots: Pay close attention during application to avoid streaks or patchy areas. Work methodically, overlapping your strokes slightly to ensure continuous coverage. Careful application is needed to prevent streaks from forming (translated from Korean) Naver Blog: Self-Interior Paint Types and Methods.
- Patience with Drying Time: Allow adequate drying time between coats and before removing masking tape. Rushing this step can lead to smudges, peeled paint, or a less durable finish. While a self-painting project can be quick, like the blogger who aimed for 30 minutes for a small room but took 1 hour and 30 minutes due to filming, proper drying time is still crucial for quality (translated from Korean) Naver Blog: 7 Tips for Wallpaper Self-Painting.
Organization and Efficiency
- Paint in Sections, Not Whole Rooms: Instead of trying to paint an entire room at once, especially if it involves different types of surfaces (e.g., walls, doors, trim), break down the project. For example, paint all the doors in your apartment, then all the walls, then all the trim. This method, suggested by a blogger, makes the work more manageable and less overwhelming. "When painting your house, don't tackle an entire room at once; instead, work on specific elements like all doors or all walls. This makes the job easier and more comfortable" (translated from Korean) Naver Blog: 7 Tips for Wallpaper Self-Painting.
- Keep Wet Wipes Handy: Accidents happen. Having wet wipes or a damp cloth readily available allows you to immediately clean up any paint splatters or drips on unintended surfaces before they dry and become harder to remove.
- Wear Disposable Clothes: Protect your clothing by wearing old clothes that you don't mind getting paint on. Even experienced painters can get paint on themselves. "I ruined a few clothes at first," one blogger admitted (translated from Korean) Naver Blog: 7 Tips for Wallpaper Self-Painting.
- Use Ladders or Stools Safely: For areas near the ceiling or high up, use a sturdy ladder or stool. Safety is paramount to prevent accidents during your DIY project.
By integrating these expert tips into your DIY wall painting process, you can achieve a more efficient, cleaner, and ultimately, more satisfying result for your Korean apartment. Remember that even though a project can be completed in a relatively short time, like the 1 hour and 30 minutes a blogger took for a small room with 20-year-old silk wallpaper, focusing on technique and preparation will yield the best outcome (translated from Korean) Naver Blog: 7 Tips for Wallpaper Self-Painting.
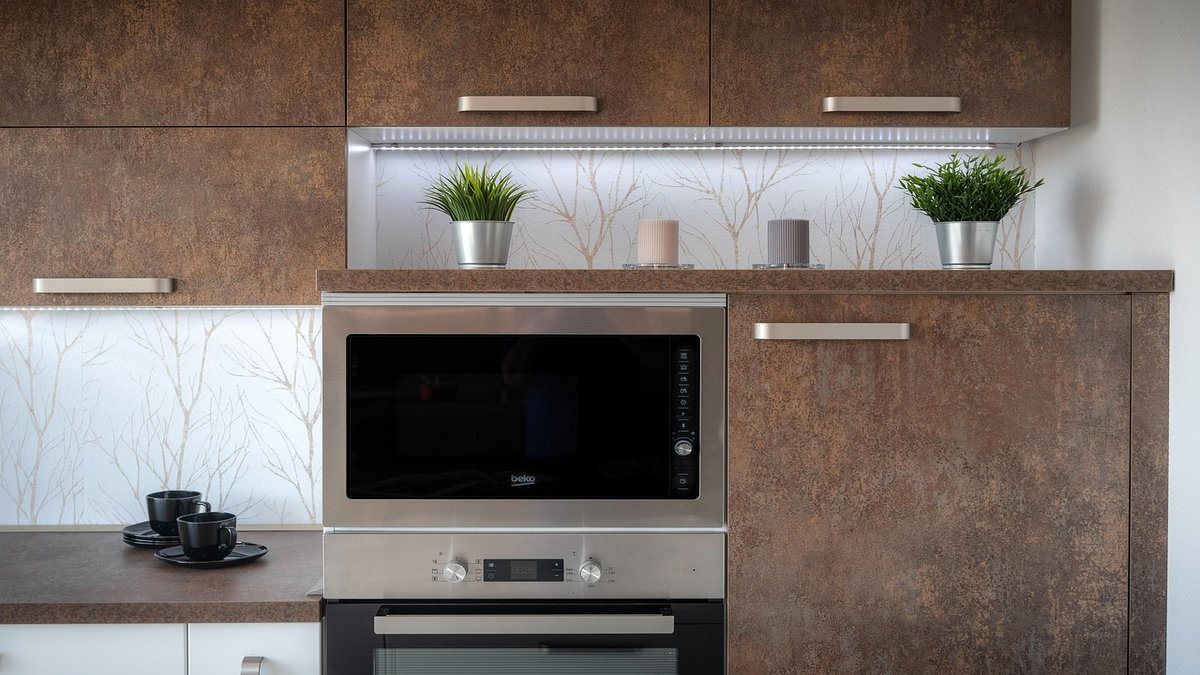
Can You Paint Other Surfaces Like Kitchen Countertops?
While wall painting is a common DIY project, the desire to refresh and update other areas of a Korean apartment, such as kitchen countertops, is also prevalent. The good news is that specialized paints and techniques exist for transforming these surfaces, allowing for a cohesive and updated look throughout your home. However, painting high-traffic and functional surfaces like kitchen countertops requires specific products designed for durability and adhesion to non-traditional materials.
Painting Artificial Marble Kitchen Countertops
For kitchen sink countertops, which are often made of artificial marble in Korean apartments, there are specific methods to consider for painting. This material requires a robust finish that can withstand daily use, moisture, and cleaning agents. According to expert advice, you have two main options for renovating artificial marble countertops:
- Transparent Hardening Coating: One method involves applying a UV transparent coating. This approach preserves the existing look of the artificial marble while adding a durable, protective layer. It's ideal if you are satisfied with the current color and pattern of your countertop but want to enhance its resistance to scratches, stains, and wear. This method essentially creates a clear, hardened shield over the surface.
- Colored Painting with All-Purpose Urethane: If you wish to change the color of your artificial marble countertop, colored painting is the way to go. For this, "all-purpose urethane" products are highly recommended. These are specialized paints formulated to adhere to a wide variety of challenging surfaces. The key characteristic of all-purpose urethane is its strong adhesion to diverse materials, which is crucial for a smooth and long-lasting finish on non-porous surfaces like artificial marble.
Characteristics of All-Purpose Urethane Paints
All-purpose urethane paints, also known by brand names like Manneung Urethane, Magictan, Senstan, Evatan, and Moacoat (translated from Korean), are highly versatile and durable. They are typically 2-component oil-based paints, meaning they consist of a base and a hardener that are mixed together before application. This two-part system creates a very tough and resilient finish.
Key features of these paints include:
- Strong Adhesion: All-purpose urethane paints are specifically engineered to provide excellent adhesion to a wide array of materials that are traditionally difficult to paint. This includes glass, tiles, stainless steel, non-ferrous metals (such as galvanized steel, white pipe, and galvanized pipe), bathtubs, various plastics, iron, and, importantly, artificial marble used for sink countertops. This makes them a "universal" solution for many challenging surfaces in a home.
- Durability: Due to their two-component, oil-based nature, these paints offer superior durability, scratch resistance, and chemical resistance compared to standard wall paints. This is essential for kitchen countertops that are subjected to frequent cleaning, spills, and impact from kitchen utensils.
- Variety in Finish and Color: These products are available in various sheens, including high gloss, semi-gloss, and matte finishes, allowing you to choose the aesthetic that best suits your kitchen design. They also come in a wide range of colors, giving you the freedom to completely transform the look of your countertops.
- Strong Odor: It is important to note that all-purpose urethane paints are oil-based and typically have a strong odor due to the volatile solvents used. Adequate ventilation is crucial during application and drying. This is a significant consideration, especially in an apartment setting where odors can linger.
Application Process for Countertops
While specific instructions will vary by product, the general process for painting artificial marble countertops with all-purpose urethane involves:
- Thorough Cleaning: The countertop must be meticulously cleaned and degreased to ensure optimal adhesion. Any residues will compromise the paint's ability to stick.
- Sanding: Lightly sanding the surface can help create a rougher texture for the paint to grip onto, further improving adhesion.
- Masking: Protect surrounding areas like cabinets, sinks, and walls with masking tape and covering tape.
- Mixing: Carefully mix the two components of the urethane paint according to the manufacturer's instructions.
- Application: Apply thin, even coats, allowing sufficient drying time between each. Multiple coats may be necessary to achieve full coverage and desired durability.
- Curing: These paints often require a longer curing time than regular wall paints to reach their full hardness and durability. Follow the product's recommendations for when the countertop can be safely used.
Painting kitchen countertops, particularly those made of artificial marble, is a viable and impactful DIY project for refreshing your Korean apartment. By choosing specialized all-purpose urethane paints, you can achieve a durable, aesthetically pleasing finish that withstands the demands of a busy kitchen, transforming the space without the cost of full replacement.
Frequently Asked Questions
Is it better to paint or wallpaper a Korean apartment wall?
Painting is often considered easier and more affordable than wallpapering for interior renovations in Korean apartments. It offers precise color expression and typically doesn't require separate molding finishes, saving time and increasing efficiency (translated from Korean) Naver Blog: Self-Interior Paint Types and Methods. However, painting over existing wallpaper requires a flat surface, as moisture from paint can cause wallpaper to wrinkle or crack.
What are the main types of paint used for interior walls in Korea?
For interior walls, the main types of paint are water-based, oil-based, and eco-friendly. Water-based paints are affordable, fast-drying, and low-odor, making them suitable for indoor use. Oil-based paints are more durable and weather-resistant but have a strong odor and longer drying time. Eco-friendly paints are similar to water-based but contain minimal harmful substances, ideal for sensitive individuals or homes with children (translated from Korean) Naver Blog: Self-Interior Paint Types and Methods.
Can I paint directly over old wallpaper?
You can paint directly over old wallpaper, but it's crucial to inspect it first. Ensure the wallpaper is firmly attached, free of tears, and has no loose seams, as water from the paint can cause it to wrinkle or peel. If the existing wallpaper is damaged or uneven, applying putty and sanding may be necessary before painting (translated from Korean) Naver Blog: Self-Interior Paint Types and Methods.
What is gesso and when should I use it?
Gesso, also known as primer, is a thick paint that smooths the wall surface, covers existing colors, and improves the adhesion of your final paint coat. It's highly recommended when painting a light color over a dark existing wall, or over stained/glossy surfaces. Applying 2-3 coats of gesso can significantly improve color development and durability (translated from Korean) Naver Blog: Self-Interior Paint Types and Methods. After gesso application, allow it to dry for about 1 hour before painting.
How long does it typically take to paint a room yourself?
The time it takes to paint a room yourself can vary, but a focused self-painting project can be completed relatively quickly. One blogger noted that a small room with 20-year-old wallpaper could be painted in as little as 30 minutes if focused, though their actual project took 1 hour and 30 minutes due to filming (translated from Korean) Naver Blog: 7 Tips for Wallpaper Self-Painting. Preparation, including cleaning and taping, will add to the overall time.
Sources
- Naver Blog: Self-Interior Paint Types and Methods
- Naver Blog: 7 Tips for Wallpaper Self-Painting
- Naver Kin: Self-Interior Paint Questions
- Naver Blog: Adhesive Insulation Wallpaper Review
- Tistory: Adhesive Insulation Wallpaper Effect Review
Related Reading
- How Korean Interior Differs by Apartment Age
- Korean 10-Pyeong Apartment Interior Ideas
- Korean Apartment Rental Interior Guidelines
- Korean Kitchen Cabinet Refurbishment DIY
- Korean Officetel Interior Tips and Tricks
— The Self Interior Team